How will I structure my progress?
When I did animation electives back in my uni, my uni teacher told my class to write an online journal on our processing and understanding. This particularly helps me in my 3D animation so I figure I give it another shot.
So for each lesson I do, I split the lesson into key section where I:
Summarises key points gained Explains my view and perspective on this section Displays my work after some practices on it
With that in mind, it's time to go with the first lesson - Photoshop Manipulation (I)
Photoshop Lesson (I)
I have used Photoshop before but not for digital drawing purpose. No, I rather used Photoshop to add special effects such as shadow via a reference vector image or remove a particular part from an image. Drawing wise, I use both Krita and Sai.
As a result, my Photoshop skill is decent as I can produce good manipulated images for particular idea, but I believe that I haven't used all of the tools available in Photoshop.
Key note to make is I'm using an old version of Photoshop which is CS6. So, I may not do some of the section of this lesson due to the limitation.
Lesson Notes
The lesson may be quite slow and dreary as I already know most of the tools on Photoshop. However, in the best interest of going slowly, I watched the whole Photoshop lesson video... while doing something else such as programming or moving around.
After watching and rewatching key parts again, there are some tools that Marc touched on that I was surprised to not know, let alone try it...
You can manipulate your image colour via Hue/Saturation, Levels or Curves. Healing Brush is great to remove minor detail such as scratches. Clone Stamp Tool is great to add part of other images into the primary image, which is then blended in carefully via the healing brush.
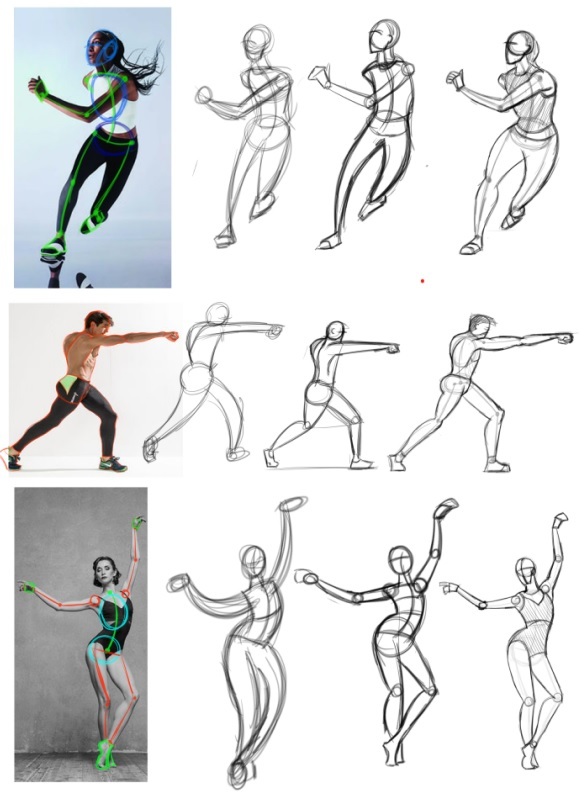
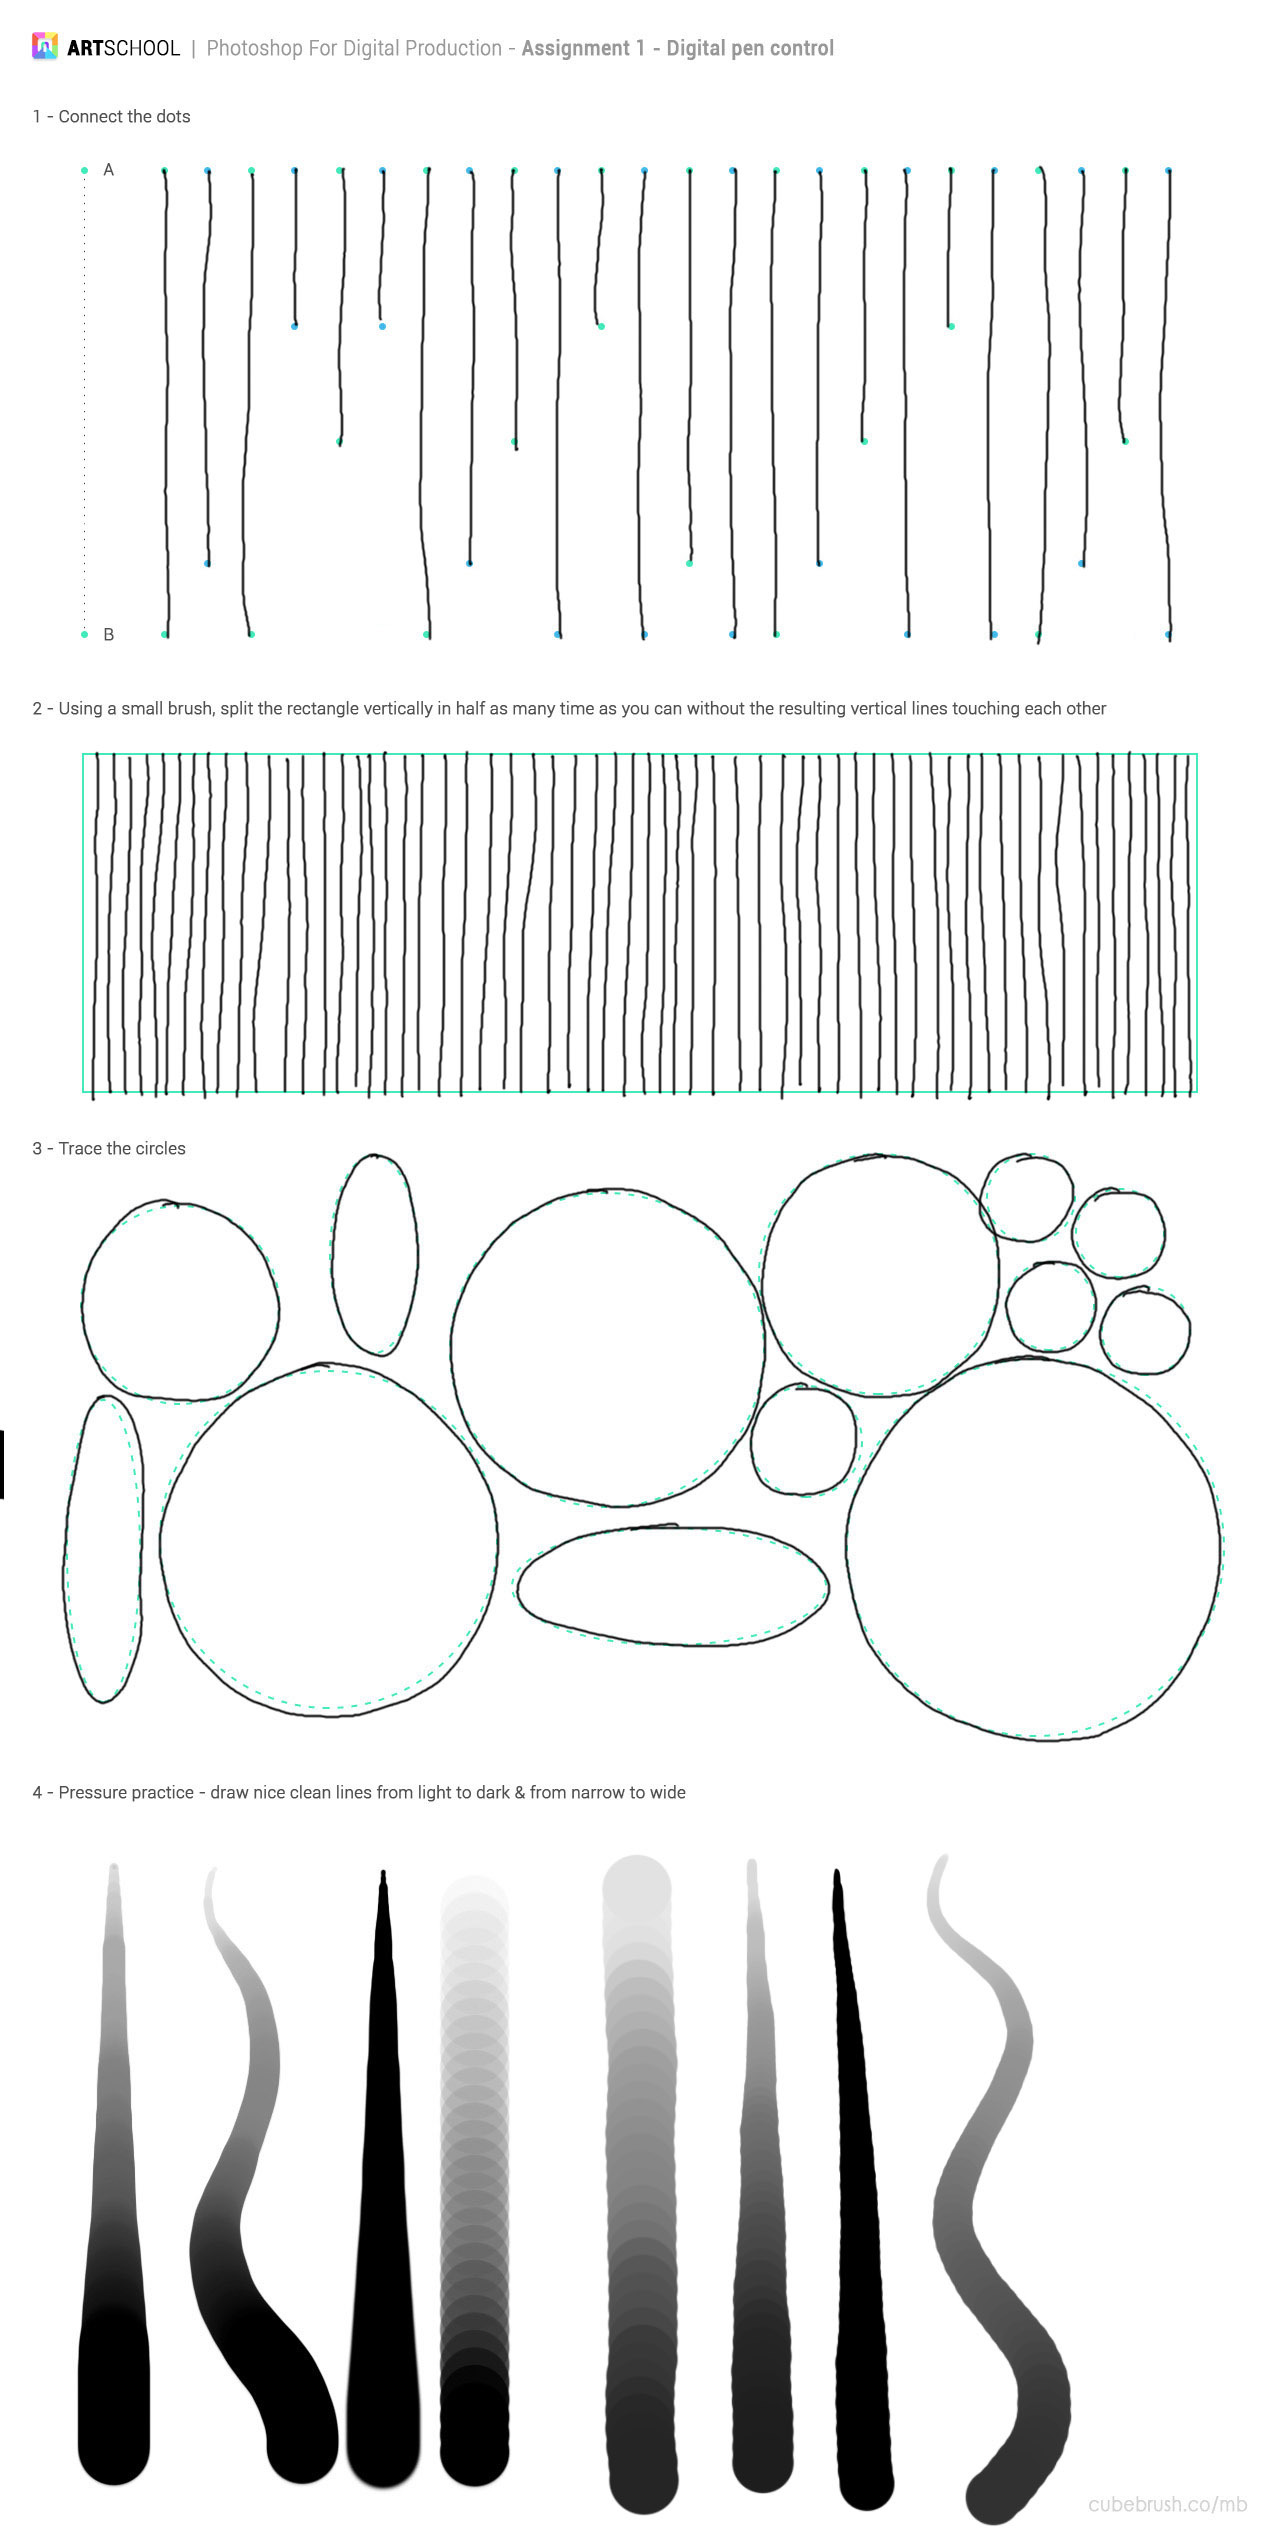
Part 1 - Pen Control
I'm relatively new to my XP Artist Pro 15.6 tablet (only been 2 months so far) as this is my first visual graphic tablet. Before, I have used my Wacom Medium Tablet for the past 5 years.
As a result, this is relatively no trouble when doing pen control. For me, there's no particular technique to make this easier; just practice using the pen/pencil more and more.
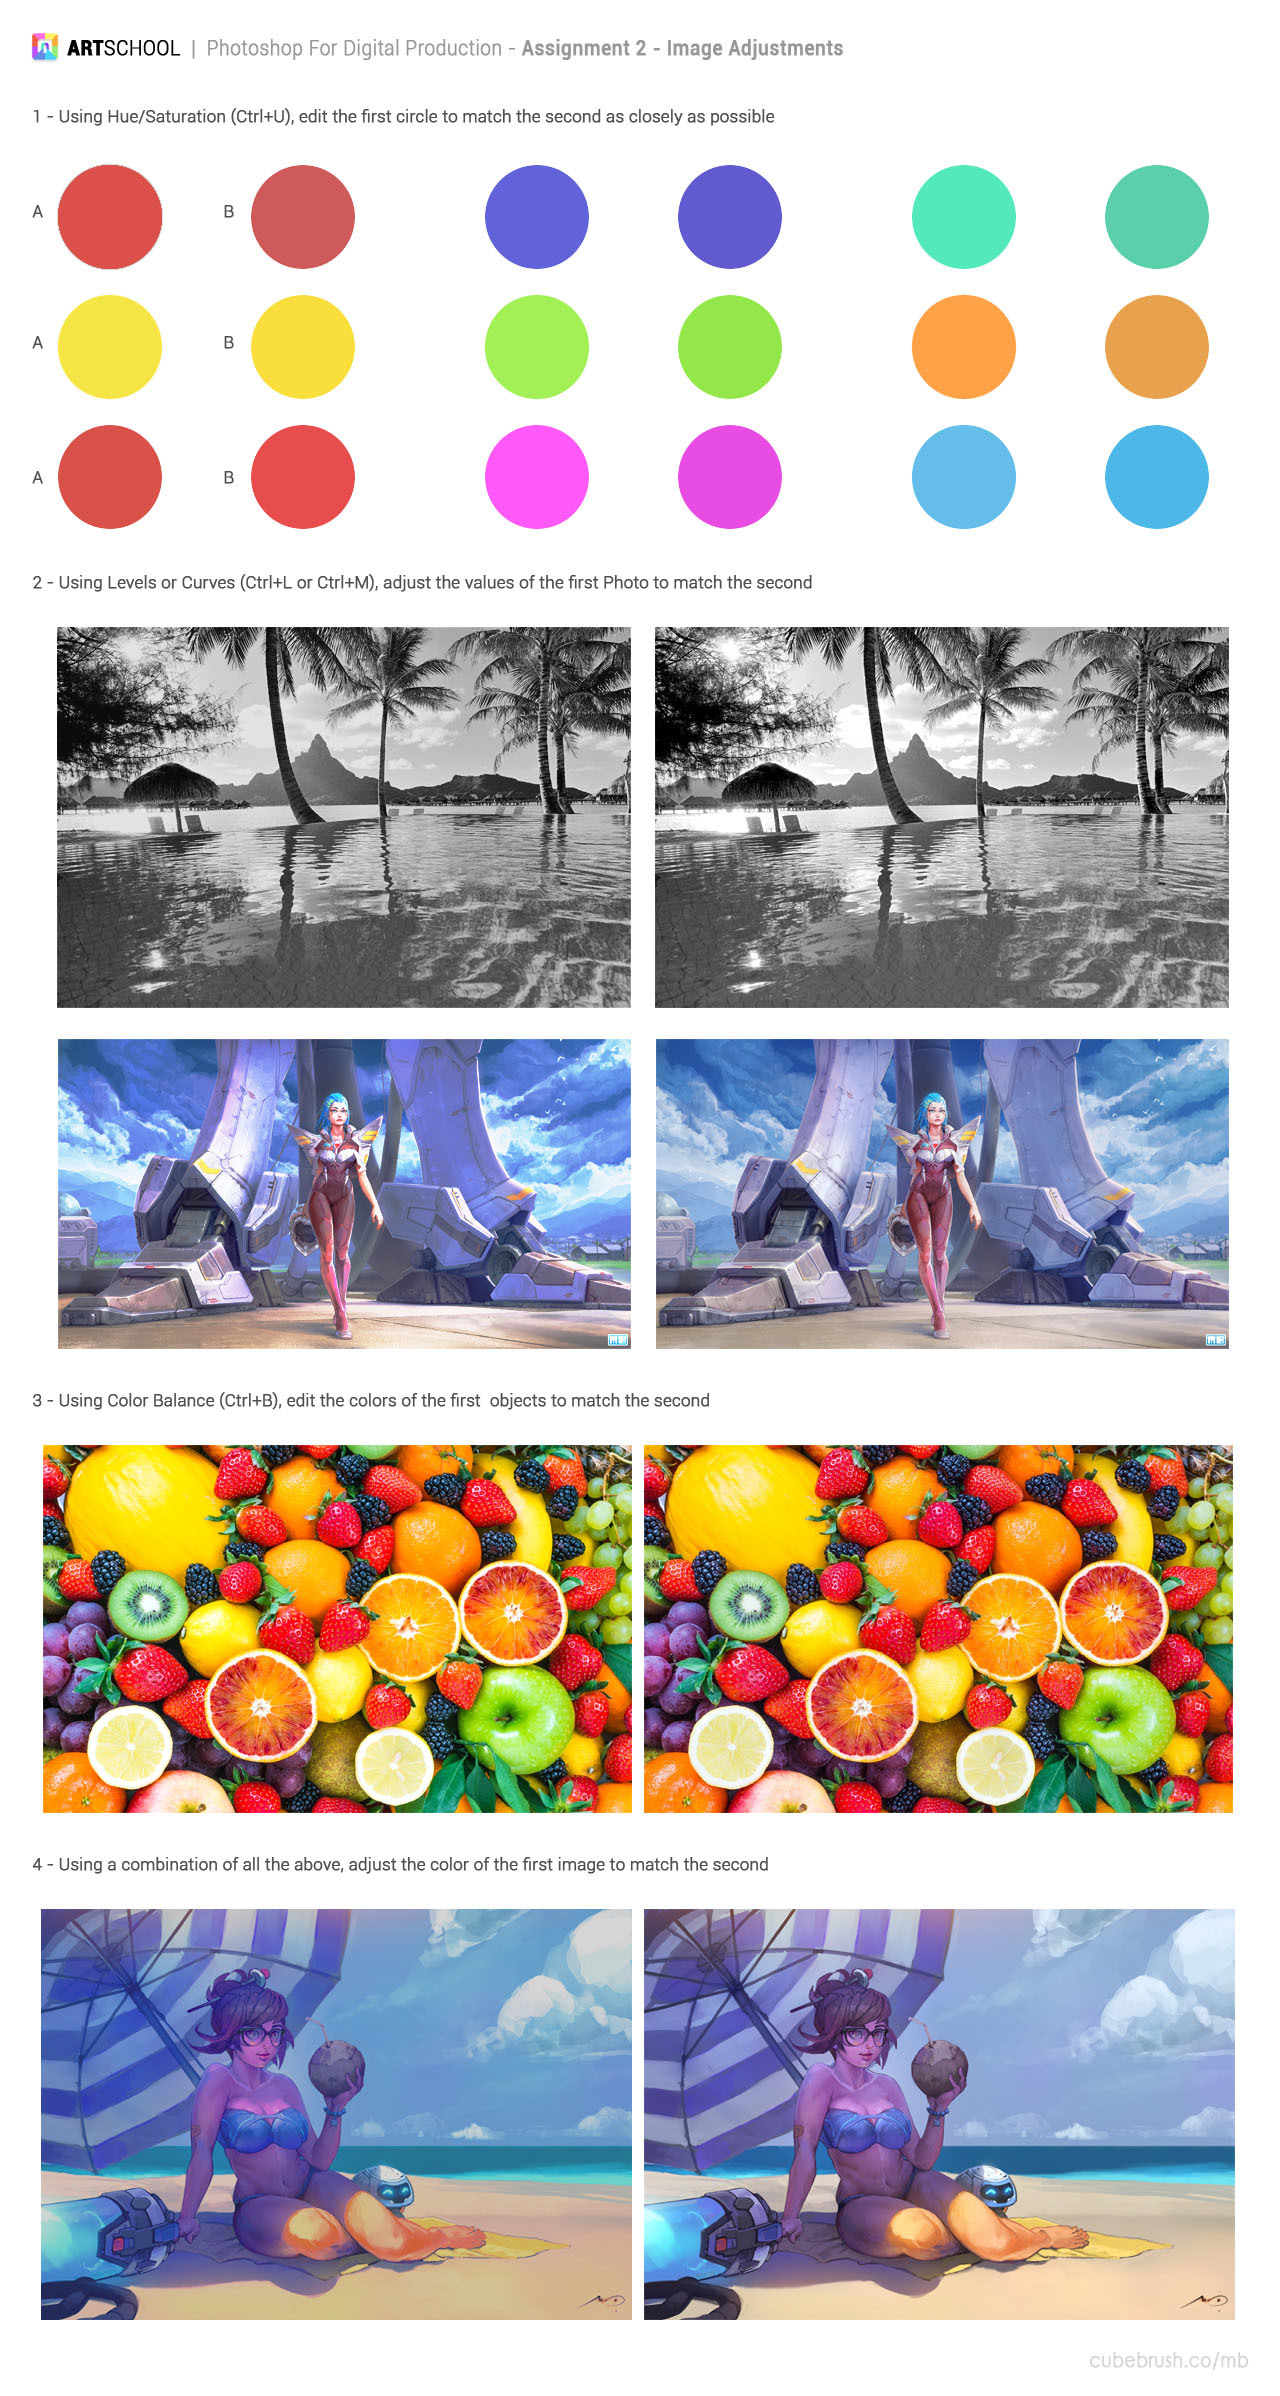
Part 2 - Image Adjustment
An interesting challenge as it's more touch and feel if it is right or not.
In the first part, I note that it's easier to brighten the colour via the hue/saturation and then try to get the hue right. Then, you can slightly adjust the saturation and lightness to then get the target colour. As a result, my accuracy was pretty high and quicker as I continued onto the exercises.
The last exercise proved to be a big challenge as there are multiple ways of getting the colour nearly right. I think my downfall was that I look and compare just one item (e.g. the sand). In a hindsight, I think I need to stop and think about how the current effect affects the WHOLE image, not just one part.
This part definitely worth a review in the future once I get better at manipulating image colour.
Part 3 - Combining Image
Again, this has some challenges as although I have experiences using the selection tools, I have never adjusted the image colour ever so this is a first time for me.
In my opinion, I think I got the correct atmosphere appearance for my main building. I put the building on the right to not only ruin a great view of the Chinese lake but also challenge myself to place the building behind the trees. Pretty difficult but it just shows the power of Photoshop as with more touches on it, you can easily make it look like the building actually belongs in the lake, when really it's not.
I may want to do this one again at a later basis to have a new view on this work and do this one more time.

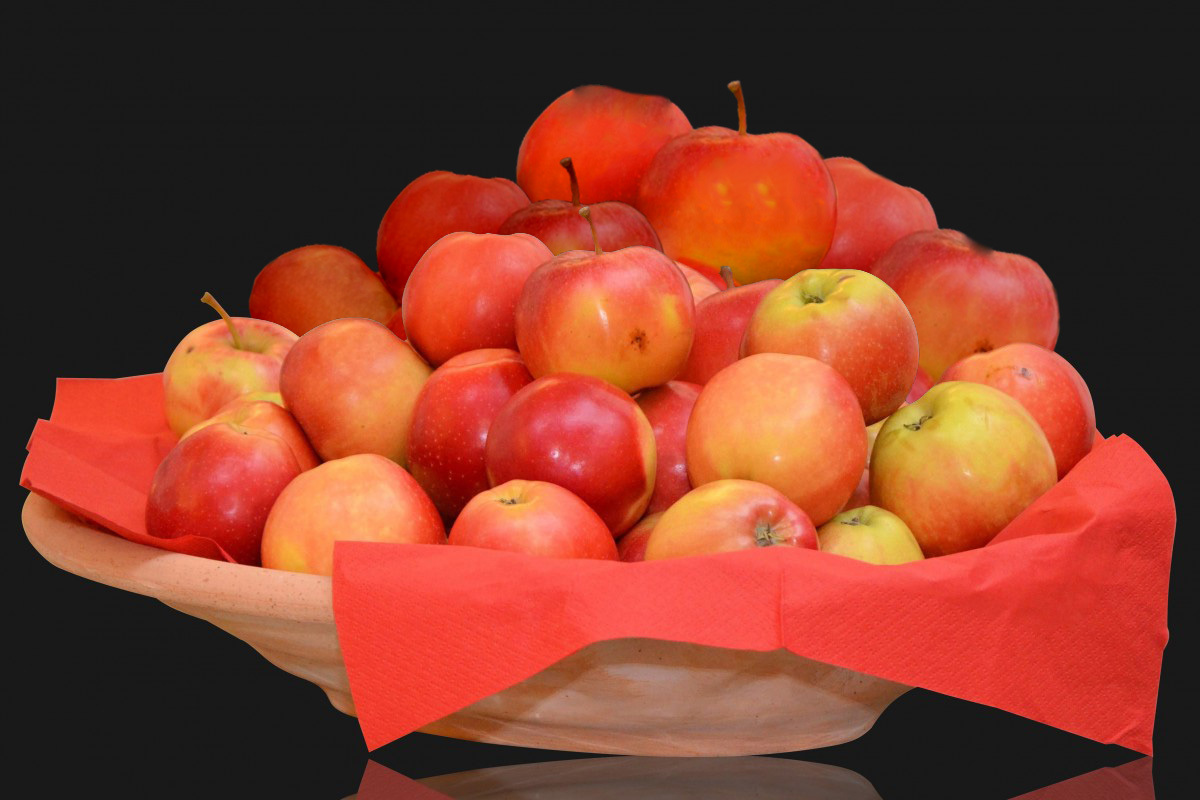
Part 4 - Selection/Liquify/Heal/Stamp
Due to my Photoshop version, I was unable to do the last task. However, I did complete the other tasks.
For the first task, the main challenge is to add apples from existing image but make sure it doesn't look like it's from the existing image! This involves some manipulation techniques such as adjusting the image colour and using healing brush to remove key feature of existing apples (e.g. black spot).
I placed the duplicated apple layers in the back as it's easier to blend in, supported by a quote from somebody who said to me "The easiest way to animate a walk is to put a bush in front of their leg!". That quote somehow stuck to my head for a long time...
The next challenge is harder but kinda fun to lay around with the cloning tool. I was kinda shocked as how easy it is to use Photoshop to manipulate a person image into something else entirely. Sorry Kendrick Lamar but I'm not sick and tired of Photoshop.
Overall
First video, this was a refresher for me. Yes, it was kinda tedious as I know most of the tools on Photoshop. But so is programming concept back in my uni time so I remain committed and it paid off as I now learnt how to use the healing brush and manipulate the image to my liking.