Gave myself 5 days to do something. This is what I managed to do. I'm trying to get better at illustrations, but I have patience to work on something for 3 days maximum :(
Splash_Process.jpg5000x3140 2.21 MB
Splash_Process-6.jpg3896x2429 2.83 MB
concept list char copy.jpg5388x3000 1.7 MB
Day 4: Star Wars
May The 4th =]
Queen Padmé Amidala in my art style!
First time drawing her and I really enjoyed making this one!
Used watercolours, ink pen, acrylic markers and gold paint for accents on my Canson mix media sketchbook.
I hope you like it!
Thank you! I finally cleaned that up. Meanwhile started 3 more ..I have a habit of taking too long to finish a piece, then I lose interest in it and just start something else. I found 8 from recently i started and abandoned, that are decent enough to not delete, but not finished. There’s also been a number of drawings I felt I “outgrew” - became better before I finished them, and it would be easier to start from scratch than fix them. Anyone else thinking that?
Lady Death Fanart Collectible: Part 6 Polypaint and base
Hi, it’s time to share with you another part of the process to create this fanart piece.
Polypaint
As this is my first collectible fanart I didn’t have previous experience with polypaint so I tried my best and played a bit with it.I wanted to give a ghostly and eerie look to Lady Death, she is beautiful and deadly, but at the end of the day she is a woman that died and was reborn at hell as an avenging spirit, that’s why I gave her skin tone a bluish very cold tone.As you will see I gave myself some creative freedom to deviate from the traditional color scheme that this characater has in comics and illustrations.To add a bit of sensuality by painting some freckles on the face and the chest.
The dark nature of this character was the perfect excuse to gave her a kind of goth make up, very dark shadows around the eyes, blue lips and fingernails. I know that the original character includes sexy red lips but I wanted this girl to have a sexy but at the same time creepy look, that’s why we can see some thin veins emanating from her eyes.
The biggest chromatic change I did for this character is at the hair. Lady Death has a characteristic white weavy hair but in my fanart I decided to gave her a very saturated blue color.The reason behind this wasn’t only an aesthetic choice. I want that the face area strongly pulls the attention of the viewer so this area needed a stronger contrast. Another reason is that I want her to have a more modern look, as I mentioned before, I’m strongly attracted to women with goth/punk look.
I gave myself half an hour or more to analyse the work of experienced sculptors that create collectibles and I discovered that the use of darker values on the skin is often applied to create a greater sense of volume and three-dimensionality. I found that areas with heavy ambient occlusion are the perfect places to paint with darker colors in order to increase the separation between different forms.
Even though she has a bluish skin tone, I used a bit of warmer hues in areas that, in real life, tend to go towards red and pink, this is very obvious in the nose, cheeks, and knuckles. Thinking with a logical mind it’s completely absurd to have warmer tones on the body of a zombie like creature but I didn’t want to limit myself by using only blue tones, it looks boring and artificial. In real life these colors are created by blood vessels in areas where the skin is very thin.
**
Scythe
**for her weapon I applied a cool gray with some warmer variations, this color scheme is influenced by the work of H.R giger.
Base
I’d like to talk about the design for the base which, to be honest, I forgot to develop along with the character.My main idea with the base is to show that Lady Death inhabits a very sterile and arid land, at the end of the day she is at hell.You can see a that she walks over dirt and rocks, a sign that she’s surrounded by death and loneliness.
As part of the landscape we can see some bones and skulls to reinforce the idea of lack of living creatures, yet we can see three hands that try to reach her legs.This hands represent that all creatures are subordinated to her power and seek an evil blessing with a simple touch of the princess of the damned.1- The hand with skin burns represents the souls of those who are newcomers to hell, tortured souls that suffer for the sins comitted on earth.2- The hand with greenish rotten skin and pustules is the reminder of the decay that has infected the souls of those who have been trapped and have forgotten their humanity3- Last but not least, the hand of a demon shows that even dark creatures and entities bow before her presence.
The cherry on the top, at least in my vision, are the simese twins that emerge from the ground, this malevolent creatures remind us that in hell there’s only perversion and any trace of innocence is lost.
Thanks for reading till this pointI’m really happy to be very close to finish this creative journey, last but not least it’s mandatory to talk about splitting the sculpture in several pieces to be printed, this will be my last entry before showing the final rendered images.
See yaMay Zbrush be with you
memory
2min gartic phone, used ref
2m gartic, used ref for pose
2min gartic
2min gartic
2min gartic
2min gartic
memory
memory
memory
memory
study
memory
memory
memorymemory
memory
memory
memory
memory
memory
study
memorystudy
study stylized
left memory, right study
study
memory
memorymemory
memory
memory
memorymemory
memory, porportions r offmemory
memorystudystudy
memorymemorymemory
memory
memory memory
memory
memory
memory
memory, right leg is a bit broken
The feeling of only getting 1 - 3 likes on a social media post will never not be discouraging. But nothing is discouraging enough to make me quit drawing. I think the strategy of drawing a lot of stuff and waiting a while to post is good though rather than posting it immediately and then feeling that sadness on the next set of drawing
studies
studies
juri study
imagination, how I feel before a speech
imagination
imagination
study
something I drew for my presentation
also drew this for my presentation, didn't fix the one hand being bigger than the other
imagination + study
study
studies
study
study, I need to fix the face a bit
based on screenshot from anime but in my style
study. except for the eye
study
studies
studies
study. changed some things tho
imagination
imagination
imagination
study
studies, except top right samurai
based on anime screenshot
wolverine studies, changed some of the poses a lil, not very good at all, but first time i drew the character ever.
semi study
studies
study
imagination
imagination
imagination , for first time ever i tried to draw over 3d model for middle pose, I dont like the result tbh, but it makes it much easier than coming up with it from memory.imagination, except right figurestudies
imagination + studies, coming up with action poses r hard, these are not dynamic enough, I will redraw better ones in future.
imagination
, imagination
imagination
study, except for eye
imagination
imagination
imagination doodles except for the two chrollos
imagination storyboard thumbnail, idk if i ever shared this. my storyboards end up being a little detailed since i usually just draw in one layer.
Neon Gambit
This is a fan art of my all time favorite character Gambit from the X-Men.I made this a birthday gift (26.04.2024) to myself and honestly I really do like how it turned out in the end =] I hope you like it as well =]
And some more! Been painting over them a bit more this time.
Some variants I tried for the old guy using mainly the liquify tool. Someohow looking a bit like Owen Wilson (not intended :D)
Hello!
My name is Vithor, I am from Brazil, studied Design at a local college worked as an illustrator for more than 10 years. I took a time off around 3 years ago and am trying to get back in my art shape and maybe become professional again.
Here are some recent pictures:
You can find timelapses for most of them on my instagram:
www.instagram.com
Vithor Albertim (@vithor_albertim) • Instagram photos and videos
123 Followers, 638 Following, 19 Posts - See Instagram photos and videos from Vithor Albertim (@vithor_albertim)
Comments and critiques are always welcome.Cheers!
Thank you @daceronine! If I remember I save in google cloud, I will have to stick a note to do it more often. Lamp is from life. Poses are from refs but I look at refs for a while and then try to do it myself and look it up if needed. Outfits and rest is from imagination
Something went wrong while installing system so we will have to wipe everything again... pc works but something is wrong. We will wait till internet is done and I will save everything on cloud this time
Threads came out in eu. It's been 3 days and I had more engagement than after half a year on instagram. It feels really nice I hope it stays this way
A portrait of old dude. It's the same character I posted a while ago. Inspired by Bayard Wu work. At first I thought of him as a bear but I named him Fenrir and I think wolf suits him better. Eye gave me a bit of hard time but I think it is fine now. I focused on face and forgot about area below. The way I draw hair clashes with greying hair. I had the same problem while doing Lohse's white hair. Does it looks like it is greying here?
I love how desaturated red looks blue there. I keep lying to myself that I will use different color scheme but It all comes down to this blue and yellowish one it is just flipped this time
Have a great day!
Havent done much this year since I am focusing on learning programming and deving my own Indie Game . But here 's a New Year Piece 2024 , she 's the mascot for my Game Studio - Lucid Realm : Lucid Chan !
LucidChan_v001_sketches.jpg3072x4352 973 KB
Long Crested Eagle studyI had so much fun making this one and honestly I love that Eagle! It looks so cool! Used for this one high quality watercolours, high quality watercolour sketchbook/ cold press and it was 300 grams paper.I hope you like it!
Something looks off. I'm not sure what it is: maybe I made the in-shadow area too detailed? Maybe it's the lack of ambient light? Maybe it lacks edge variation? Either way, it just doesn't look right/isn't pleasant to view.
Reference from referencepictures.gumroad.com, I won't post it here due to the paywall
Okay, I'll just use the ref when talking about values.
I think you did a good job picking the colors and establishing hard and soft edges. The brushwork is fine, so I feel it looks off to you because of the values and the underlying structure needs a little adjustment.
I tried to keep the original style in tact! The first thing I did was adjust the eye to the right and make the face a little less slanted.
You did great with defining the features, but I felt like some of the edges were too sharp and dark around the chin and eyes. Like you mentioned, there was a lot going on with the shadows so I made her cheek on the left softer and made the highlight darker. I think the focal points are the highlights on her forehead, nose and cheeks. With that in mind, it's good to create less contrast in other places so they don't clash and it's easier for the eyes to move around the piece.
To make it stand out a little more I made the background a little darker around her face.
I'll post some questions that you can help us with to go through your critique.
---What is your intention for this piece? Is it to study value? Is it to study Expressions which is what the intention of the set of reference photos was for? Is it to study painterly strokes? If so which master?
---- Do you want us to paint-over your image in order to illustrate our critique theory?
Is this the image set?
I'm going to assume that this is the image set that you are talking about.
If you post it like this so we can compare the screen cap of the image at low rez with the snipping tool app, or screen cap low rez zoomed out, no one is going to get upset since it's a study, you aren't supplying the entire set or high resolution original to the public. I think you would in fact be promoting it for free. You didn't pay Ol' Noah Dollar Signs a commercial licensing fee for 629 images (the whole set) and we aren't paying you to see it, you paid for personal use of the images which you are doing...but....We can't help you as much as we are able without the reference. Until you do we will have limited ways to help.
Yes, that.
As well as you have an extremely high value range which doesn't help for an expressive portrait painting, and entirely too many tiny strokes to describe simple forms of the nose, mouth, chin, eye sockets and iris.
The highest contrast areas are going to attract the viewers eyes the most. This is the hair in your case. There is no interest there so we must look elsewhere but the high contrast pulls us back to the hair because that's how our eyes work. It pulls us into the low contrast ear
If you want this image to look painterly, Use a bigger brush and dont go below say...20 pixels for details.
Well thats impossible since this image reference set is ruined by the insane amount of ambient light everywhere.
This set, has a key light, bounce light from a screen of some kind, and a warm lamp. That's three sources. It looks like a magazine. It looks great and whatever but I think this is so you can see all of the proportions of expressions.
You can see that the overall shadow shape has all of the detail in it because of all this effing bounce light AND THEN an ambient light via a lamp on the floor, but it makes it almost impossible for a student to study the different forms of portraiture composition, shadow shapes, simple shapes and facial structure. It looks confusing as hell to paint for someone new.
If you are a student and a newbie this expression set is not for expressive portrait painting. Its for studying expressions themselves.
Can you please elaborate and describe what it is that you dont like about it? It will help you with your understanding and critiquing your own work, as well as help you write your intention. You need to trust your first instincts. Being able to decipher shape language and describe it is half the battle.
And when you write your intention use this for an example.
"My intention is to study the human female Caucasian face, in the style of Sargent/Rembrandt/Pyle/Wyeth/Zorn/Frazetta or whoever, I want to express painterly style and gain understanding of compositon"
I'll leave you with this quote from Howard Pyle, “The function of all art instruction should be to teach the pupil to analyze and to separate the lights from the darks, not technically but mentally. That which a pupil most needs in the beginning is not a system of arbitrary rules and methods for imitating the shape of an object; that which he needs to be taught is the habit of analyzing lights and shadows and of representing them accordingly. Until the pupil is entirely able to separate those two qualities of light and shadow from one another in his perception, he should not be advanced beyond the region of elementary instruction – no matter how clever and fetching his work may appear to be. That separation is fundamental to the law of Nature, and until it becomes a habit of thought, no spontaneous work of art can be produced.”
If you can wait till next week I'll get the reference pack myself and do a paintover. Prepare questions and your intention and post them but also please read through a few of my other critiques they may help.
So I took the photograph and first wanted to illustrate how many light sources are actually on the figure.
Now I'm not saying that this is bad. This is just extremely challenging for a portrait painting. The amount of light sources that you have to achieve in a painting are at most two sometimes three.
We have a flat surface that we are trying to make the illusion of three dimensions on. The easiest way to do this is control of our painting and subject. By composing the light's contrast. The viewers eye path.
There are very few life drawing sessions that I've been to where there is a secondary light source, let alone 5.
Traditionally, (and I may have heard this theory elsewhere but in my opinion ) this limitation allows artists to control the environment and composition to allow them to play. And thus where they want you the viewer to focus and how they will express themselves through mark making.
If I only have one light source I have more control over the kinds of transitions that I have to play with (value, hue and saturation and mark making) and wether or not they have the effects that I the artist desire in my finished piece.
If I have many light sources this limits my room to play with these tools of transition of form, value color and mark making abstraction. All these take a backseat to the laws of physics I now have to follow in order to illustrate what I see to the viewer (if that is after all my intent) . Especially if I am copying for the sake of studying.
Its the difference of being able to dance through a barn door in the dancing style I want vs having to crawl through a shoulder width air vent. In one anything can happen. In the other, there is only one direction to the exit. Which one is more fun? Which one is more challenging?
Moving on.
Now lets do some editing for the sake of studying this picture. First lets make it the direction you posted your study and line it up.
If we do some simple sight size orientation for comparison we can see where the measurements were 'off' and what didn't exactly feel right.
Now this isn't how we draw! This isn't fun! This is the way we critique and find flaws in our work before we show it to anybody. lol
One way we can do this to practice sight size orientation without it being a so much of a handicap, or as shown above, a boring pain in the a**, is to just drop a line that we will erase later.
But in order to drop a line accurately to digitally study a photo we need to work within the same frame ratio so we can compare our work to the original.
Old masters chose the size of the work they made based on the spaces in which they would be permanently hung. They mathematically decided the best compositional frame ratio which also decided their best oe perhaps expressive composition for the room, not just the frame. So for studying masters compositions, and studying photographs the beefing up your sight size orientation.
Like so.
Now here comes the interesting part. Regardless of your skill we can see where you characterized the drawing. All the greats caricature even a little bit.
We can see what you decided to repress on her, what you decided to emphasize on her and what you decided to leave untouched! This can tell us about your subconscious tastes in the female form. Where you see yourself, your mother, a family member. What your left side of your brain decides is the correct symbol for a nose, chin eye and ear and takes over to replicate that symbol instead of letting your right brain take over and use the shapes in front of your eyes.
In order to shut down the left side of the brain we need an easily unrecognizable inorganic reference point. This is the dropped line.
You choose where, anywhere. I just chose the inner socket of the furthest eye here. You can put it anywhere you like.
For the sake of this critique we are going to edit this picture for or expressive needs, our understanding of form and finally our understanding of composition.
To isolate the main light on the light side, the central light, I tried a few different ways to illustrate what I mean and this is one way you can try to use to simplify a complicated light source.
I did it again to illustrate my purpose even further.
We did it. Through the magic of Photoshop we finally were able to find and show you the main light source. Your path to separate the light and the dark becomes clear. With this information we can paint more confidently. I now am understanding that crazy occlusion shadow that the floor lamp is making on her jaw, it's there in order to make a jaw line definition which was lost in the ambient light.
Part 2. Drawing and painting the head. Coming soon.
OH WOW okay so I didn't see your reply until now and goddamn thanks so much! I don't even know where to begin. A lot of the stuff here has been super helpful, especially the point about me not abstracting the right things/areas and the confusing point of focus.
Anyway, my intention for this piece was to see if I was able to paint a portrait with super strong ambient light, and do so without starting with a greyscale. I find that I'm more experienced with pieces containing strong directional spotlights (coughbut only in graphite or in greyscale lmao) and I pretty much ignore areas in shadow when painting them. I wasn't trying to go for an accurate portrayal of the model, I was aiming for a simple portrait in which the lighting is portrayed correctly, the colors are chosen adequately. I was also hoping that I'd manage to resist the urge to hyperfocus on any point of the drawing and simplify the brushtrokes (clearly that didn't happen oops).
I'm now realising that a selfie ripped from instagram would probably have suited my purpose better.
Also I super appreciate the offer of a paintover, and the long essays you're writing for me. I'm gonna give it another go (either with this reference pic or a different one), but with your comments in mind.
Anyway, for questions here are some I have: - How do I uhh, choose colors. Let's say in the eyeliner since it's black. Do I choose a tint near the skin tone (I'm assuming cooler, due to the warm light?) and lower its value? In fact, how low should the brightness of this be? I'm struggling a lot with uhh color harmony. Turns out irl physics don't look too interesting on a canvas.
Value range. Just a question regarding the range of values present on human skin. A lot of my portraits end up looking plasticky/don't look good with a gradient map due to too much (happens more often)/lack of contrast. Look, I can probably use the color picker, but I feel dirty when I do so, I feel like I've cheated.
How deep does one's understanding of light physics have to go? Because I'd like to think that I pretty much know all of the basics (how specular light shows up on an object, core shadow shenanigans, subscatter of translucent stuff in midtones, ambient occlusion is a thing, photons bounce therefore ambient light, midtone brightness depends on photon concentration), but also I'm beginning to suspect that focusing on all this stuff might be screwing over my paintings because I end up trying to make them too accurate to real life
So after looking at some of your other work online (thank you for sharing) I see that you are needing a process for studying and breaking down real life and references for your own personal knowledge gain. Bravo for you!
I also have an understanding for your stylistic choices and levels of confidence.
I want to tread the line between art lesson and personal critique in order to be useful for people who come across this. I wanted to answer your questions because they are questions many have had including myself and they are not easy to find the names of let alone the explanation or history. I will eventually get back to your portrait but I think I stumbled upon answering a question that I've had for many years by doing the research today.
I'm going to have to elaborate and explain some things that I have saught for a long time and I just might have found it.
In moments like this where you wonder what to do, Always refer back to your intention. It will help you get through the confusion of finishing your current piece. If it doesn’t fit your intention (studying light) you simply can ignore it.
But to be thorough -
This eyeliner is so close to looking like her eyelash, I would take the artistic license and change it to a dark purple or a mute blue since there is so much warm in the piece. But making changes like any choice in your own creations is reactionary, so try it and if you don’t like it try something else. Or just leave it black and say you nailed the technical excercise. But we want to make something that looks like a piece of art.
. . . . . 2 - Into The Rabbit Hole . . . . .
Great creativity is born from strict limitation.
This is a lot to unpack in this simple sentence of yours. Historically painters compensate for real life physics because paint pigments have limitations and don't have the same attributes that light has. So simulating the intensity of real life light by utilizing the contrast of colors, or color relativity, next to each other, would provide the illusion of light's intensity of color in real life. And instead of paint, used the brain's overcompensation to relieve strain on the eye to create the illusion of real light.
People may disagree with your statement, but trust me I understand where you're coming from. The eyeliner may not have been the best example… But I do feel the need to elaborate why this is a thing and it gives me the opportunity to explain something very elusive in my education and very subjective in its application. Not to mention perhaps extremely advanced in art education.
We can change the color hue we paint with on forms to add "vibrancy" that doesn’t exist in a photograph, or real life, and fool people as I mentioned painters have before.
Ron Lemen made a video about it here. https://youtu.be/_vF7wdqCS8g And he put it best. You can have a technical exercise or a work of art.
He made another video with the simplest explanation I have heard of the complicated process art students are taught to replicate real light. In this video is where I found the relationship of color strings and the rules you can set upon them when painting.
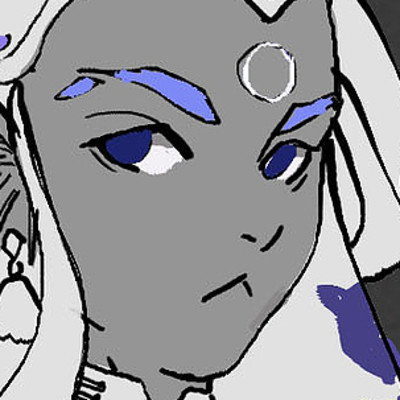
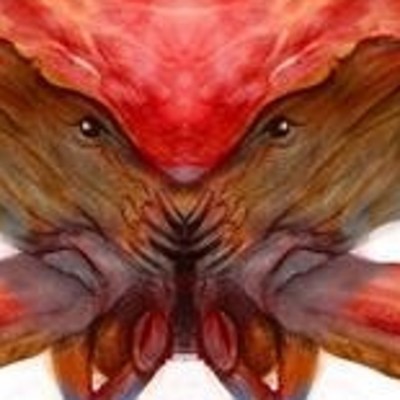
Look at these. Nice Vibrancy. Juicy color. When I first found them I thought what planet are they from? How do they do that with color? They are using the above color strings to describe forms of plains and intensity of light within the main shadow and light areas. They can limit themselves to bolster a style, or enhance an area effect to draw focus in the composition.
See how the blue devel has green blue and red in his skin tones. How the skull in the space helmet has dull purple and orange and yellow but appears to glow? The Blonde lady with purple on her face. All elements of contrast inteded to draw the eye without being over bearing, but at the same time adding vibrancy.
For a long time I always wondered things like “why that color? This looks so alive but why? I would never have chosen that color because it isn't what I see.“
Your job is you have to control the viewers interest.
To quote Stan Prokopenko, " We make these decisions to improve the visual impact of our picture."
Stan started talking about "transitions" of of plains on a video I found. He talks about it starting at 5:50 https://youtu.be/wlLU05hmXyA?t=350
And he revealed the thought process. They are using color hue, and saturation shift, to show the changing of form, and not using just value to show the changing of the form.
This bolstered my theory that Color hue, and separately, chroma(saturation) intensity gradations, or transitions, can add a natural vibration because of contrast in the viewers eye.
Like so.
But he only talks about it for like two seconds. And in other videos I found there is minimal discussion of it's application.
Until I found Marco Bucci's video this past winter, and it was the quickest way I have seen this concept explained in actual application of the practice of painting, it includes a portrait. https://youtu.be/kYtGh2xTAlg
And then they published THIS video. Where Marco called his color vibrancy his "color trajectory", And calls these little accents of blue dots on brown hair "tension colors".
But stylistically he will use them to create "transitions" of plains like Proko states in his video and also sometimes just dapple tensions of color like the blue in the hair in his video. https://youtu.be/FtQA9_vtREU
So which is it? Strict transitions, or fun dappling?
When I was in school, the only explanation I ever heard regarding this concept was, "you want there to be bits of your entire paintings colors mixed in slightly everywhere, because light bounces." That was it, that was all I ever got.....How the hell am I supposed to apply that and been only taught value for two years. It is an enormous gear shift in your brain.
When drawing with only values you are encouraged to use no more than 2 values for a NOTAN. And no more than 4 to 5 values to make strong composition. You organize form shadow shapes, and their plain transitions of 'black and white'.
Okay so stick with me here. It's the first time I've ever written this.
Value turns form, but also is the top of the food chain for how you organize different 'elements' in a picture. 'Elements' meaning the background, the character, the drapery, and the shadow shapes of each.
With colors, in my observations, As long as you follow your value groupings hierarchy, 3d forms can be emphasized by hue, and saturation changes and not just value.
Turning form with only saturation or color hue , creates a contrast of color and not a contrast of value, which when practiced, and because of color relationship theory, adds dancing vibrancy and interest, without changing the value hierarchy of the composition as a whole.
This, and the examples provided above, however complex, are simply extreme variations that adhere to the first color strings pallete method that Ron Lemen explains as 'warm to cool'.
The theories stylistic choices To achieve this affect of vibrancy seems you can adhere to transitions of form plains, or daub points of color tension or both.
I looked for this information, and for the 'why' we people would paint hue variety, why it looks so good, and how its supposed to be applied a few times over the years and came up empty handed or lack luster information. This is the first time I have been able to put a few things together to explain something this complicated this clearly and apply it in a demo.
I can only assume that the painters of history as I first mentioned used it to bolster representations of reality because of their limitations. But also stylistic choices for their focal points in their paintings.
Thank you for inspiring me to take this ride and find this answer . . . . . 3 - Value Range , , , . .
Theres a lot in this statement that makes me want to ask more questions.
"Plasticy/Dont look good with gradient map due to too much/lack of constrast" I'm gonna break this down.
Plasticy - looks shiny or fake
Dont look good with gradient map due to too much (happens more often) /lack of contrast - o.0 -- uh-- what? Dont use a gradient map right now applying the theories. Drop that. I dont know what your talking about exactly. I see plenty of people use gradient maps effectively in their work but they are just a tool to get where they want quicker. If you dont like the effect then stop. And until you replicate the theories without thinking about it only then use gradient maps to change things quickly of you want. Its juat a tool. There are no tool rules.
"Look, I can probably use the color picker, but I feel dirty when I do so, I feel like I've cheated."
Then dont. Create a pallet area. Blur your eyes and average the grouping of color and value of an area, match it as best you can, and block out your portrait shadow shapes with that. Like in the Viking critique listed above.
Start with a NOTAN. Watch this video by Dorien Iten he was a teacher of mine as well as Ron Lemen. Put Dorien on fastforward if you have too. He can put you to sleep. He taught me everything about sight size cast drawing, what I see and understanding values and arranging them. There is a semester worth of lessons right here in an hour. The language the process the whole shabang. https://youtu.be/ZTRYW7Lmdb4
Also watch this video by Marco Bucci if you dont want to watch the hour long dorien Iten one. https://youtu.be/BTYGWfiZnMA
. . . . . 4 - How deep does one's understanding of light physics have to go? . . . . .
We kind of touched on this a little bit down the rabbit hole chapter.
You need to know enough to control compositions. And make illusions that people will pay you for. Or until you are satisfied.
Yes, focusing on all that is not making the paintings better, great you understand how light works and whatever and why it looks a certain way in a photograph but you aren't making a piece of art or studying how to compose a picture. You dont have a job at a hadron collider...
You are correct, focusing on that is screwing you up. All it ever did for me was make me say, "oh thats why." Maybe it would apply to a photography class more. But then how to I tell a story with certain colors and compositions that dont exist became more important and that's what I wanted to know how to do. A technical achievement or a work of art. You get to choose.
woah, thanks for the super in-depth comment! I'll get to work reading and watching the videos that you've linked and maybe post a new portrait after doing so! Thanks so much again! Sorry for the brief reply, I don't have too much free time at the moment but I'll get back to you if I have any more questions @w@


 Jul 12, '21


